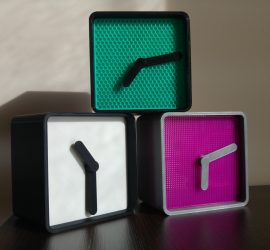
Arduino


My Arduino project

After a couple of weeks working with Arduino and learning how to use different components, it’s time you think about something cool to do with it. It really is up to you, as you can choose any project you like as long as we have all the needed materials.  Be […]


elecfreaks-rotary-encoder

Encoder and servo 6

In this activity you’ll learn how to control a servomotor with an encoder. A rotary encoder, also called a shaft encoder, is an electro-mechanical device that converts the angular position or motion of a shaft or axle to an analog or digital signal.


Seven segment display 4

In this activity you’ll learn how to show something on a seven segment display. In order to make it easier to use the display, we’ll use a library. 

elecfreaks-led-segment

elecfreaks-temp-humid

Temp and hum sensor 3

In this activity you’ll read the ambient temperature and humidity with a DHT11 sensor brick. In order to use the sensor, you’ll need a library. Libraries provide extra functionality for use in sketches, e.g. working with hardware or manipulating data.


PIR sensor 3

In this activity you’ll learn how the PIR sensors work. A passive infrared sensor (PIR sensor) is an electronic sensor that measures infrared (IR) light radiating from objects in its field of view. They are most often used in PIR-based motion detectors. We’ll use it to turn a led on or off.

elecfreaks-pir

elecfreaks-passive-buzzer

Buzzer! 5

In this activity you’ll play a melody with the help of a passive buzzer and an Arduino board.


LDR sensor 5

In this activity you’ll write some code that turn a led on o off when ambient light is low. We will achieve this thanks to a LDR sensor brick or LDR circuit.

elecfreaks-ldr

elecfreaks-push-button

Inputs and outputs: button 4

In this activity you’ll write some code that turn a led on o off when a button is pressed. You can find this code under Arduino IDE -> File -> Examples -> Digital -> Button


Hello world with Arduino: Blink 2

In this activity you’ll program your first Arduino code.
This code turns a LED on for a second, then off for one second, repeatedly. You can find this code under Arduino IDE -> File ->Examples -> Basics ->Blink
You don’t need any extra components as it uses a LED connected to pin13 that most Arduino boards have.


Electronics, 3D printing and mechanics: STEP CLOCK 5

I have been wanting to use some stepper motors to design a clock for a long time, and finally I could find some time and IT IS HERE!
It uses two steppers to move hour and minute hands independently with 3D printed concentric shafts, while one Arduino compatible board controls everything.